最初に空のAPEXアプリケーションを作成します。名前はthree.js Getting Startedとします。
アプリケーションが作成されます。
今回はJavaScriptの記述が多いので、VS Codeを使って開発することにします。ローカルで開発できるように、共有コンポーネントの静的アプリケーション・ファイルを手元のPCにダウンロードします。
共有コンポーネントを開きます。
静的アプリケーション・ファイルを開きます。
Zipファイルとしてダウンロードをクリックし、保存されている静的アプリケーション・ファイルをダウンロードします。
今回はthree-examplesというディレクトリを作成し、そこにダウンロードしたfnnn_static_application_files.zip(nnnの部分はアプリケーションID)を展開しました。
iconsというフォルダが作成され、その下にPNG形式のファイルが保存されます。
% pwd
/......................../three-examples
three-examples % ls -lR
total 0
drwxr-xr-x@ 7 ********** staff 224 9 5 14:57 icons
./icons:
total 72
-rw-rw-rw-@ 1 ********** staff 2688 9 5 05:53 app-icon-144-rounded.png
-rw-rw-rw-@ 1 ********** staff 3043 9 5 05:53 app-icon-192.png
-rw-rw-rw-@ 1 ********** staff 5461 9 5 05:53 app-icon-256-rounded.png
-rw-rw-rw-@ 1 ********** staff 522 9 5 05:53 app-icon-32.png
-rw-rw-rw-@ 1 ********** staff 12362 9 5 05:53 app-icon-512.png
three-examples %
VS Codeで作成したフォルダを開きます。
開いたフォルダ直下にファイルindex.htmlを作成します。Live Serverを起動するためだけに使用するファイルなので、以下の内容で十分です。
<html>
<body>
LiveServer is available.
</body>
</html>
VS Codeの拡張機能としてLive Serverを入れておきます。
メニューよりOpen with Live Serverを実行します。
ブラウザのウィンドウが開き、index.htmlがLive Server経由で開きます。以下のURLにアクセスしているはずです。
http://127.0.0.1:5500/index.html
同じフォルダに存在する他のファイルも、http://127.0.0.1:5500/からアクセスできるようになりました。
作成した空のAPEXアプリケーションを実行します。
アプリケーションにサインインしたのち、開発者ツール・バーのセッションより、セッション・オーバーライドを開きます。
セッション・オーバーライドのファイル・パスに含まれるアプリケーション・ファイルをオンに切り替え、値にLive Serverの待ち受け先URLであるhttp://127.0.0.1:5500/を設定します。
設定を保存します。
コピーした画像アドレスが以下のようにLive Serverを指していれば、VS Codeによる開発を行う準備は完了です。
http://127.0.0.1:5500/icons/app-icon-512.png
ページ上に2本の青い線で、上を示す矢印が書かれていることが確認できます(以下のスクリーンショットでの確認は難しいですが、書いてあります)。
最初にGetting StartedのCreating a sceneに取り組みます。
新規に空白のページを作成します。ページの名前はCreating a scene、ナビゲーションのブレッドクラムの使用はオフにします。
ページが作成されます。Getting StartedのInstallationのOption 2: Import from a CDNを参考にして、このページでthree.jsが使えるようにします。npm version listを開き、threeの最新バージョンを確認します。2024年9月5日時点では、0.168.0が最新でした。
以下のimportmapをページ・プロパティのHTMLヘッダーに記述します。
<script type="importmap">
{
"imports": {
"three": "https://cdn.jsdelivr.net/npm/three@0.168.0/build/three.module.js",
"three/addons/": "https://cdn.jsdelivr.net/npm/three@0.168.0/examples/jsm/"
}
}
</script>
以上でこのページでthree.jsを呼び出す準備ができました。
Creating a sceneの例は、最終的にはmain.jsというファイルに実装されます。例題のコードではbody直下にthree.jsの描画領域を配置するようになっています。APEXのページ内に表示させるために、描画領域をリージョンに含めるように変更します。
静的コンテンツのリージョンを作成し、ソースのHTMLコードとして以下を記述します。
<div id="container"></div>
この状態でページを実行すると、以下のように表示されます。
VS Codeで以下のファイルmain.jsを作成します。
This file contains bidirectional Unicode text that may be interpreted or compiled differently than what appears below. To review, open the file in an editor that reveals hidden Unicode characters.
Learn more about bidirectional Unicode characters
/* | |
* three.jsのGetting Startedに含まれるCreating a sceneの例題を、 | |
* Oracle APEXのページ上に表示するために、若干変更した。 | |
* | |
* 参照元: https://threejs.org/docs/index.html#manual/en/introduction/Creating-a-scene | |
*/ | |
import * as THREE from 'three'; | |
/* | |
* APEXのページ内に収めるため、windowのサイズより小さめに表示する。 | |
*/ | |
const innerWidth = window.innerWidth / 2.0; | |
const innerHeight = window.innerHeight / 2.0; | |
const scene = new THREE.Scene(); | |
// const camera = new THREE.PerspectiveCamera( 75, window.innerWidth / window.innerHeight, 0.1, 1000 ); | |
const camera = new THREE.PerspectiveCamera( 75, innerWidth / innerHeight, 0.1, 1000 ); | |
const renderer = new THREE.WebGLRenderer(); | |
// renderer.setSize( window.innerWidth, window.innerHeight ); | |
renderer.setSize( innerWidth, innerHeight ); | |
renderer.setAnimationLoop( animate ); | |
// document.body.appendChild( renderer.domElement ); | |
document.getElementById("container").appendChild( renderer.domElement ); | |
const geometry = new THREE.BoxGeometry( 1, 1, 1 ); | |
const material = new THREE.MeshBasicMaterial( { color: 0x00ff00 } ); | |
const cube = new THREE.Mesh( geometry, material ); | |
scene.add( cube ); | |
camera.position.z = 5; | |
function animate() { | |
cube.rotation.x += 0.01; | |
cube.rotation.y += 0.01; | |
renderer.render( scene, camera ); | |
} |
ファイルを作成したら、ページ・プロパティのJavaScriptのファイルURLに、main.jsを参照する行を記述します。セッション・オーバーライドが有効なので、置換文字列APP_FILESは、Live Serverを指します。
[module, defer]#APP_FILES#main.js
ページの変更を保存します。
先ほどのページを再ロードすると、以下のように表示されます。
次にDrawing linesの例題に取り組みます。
Creating a sceneのページをコピーして、Drawing linesのページを作成します。
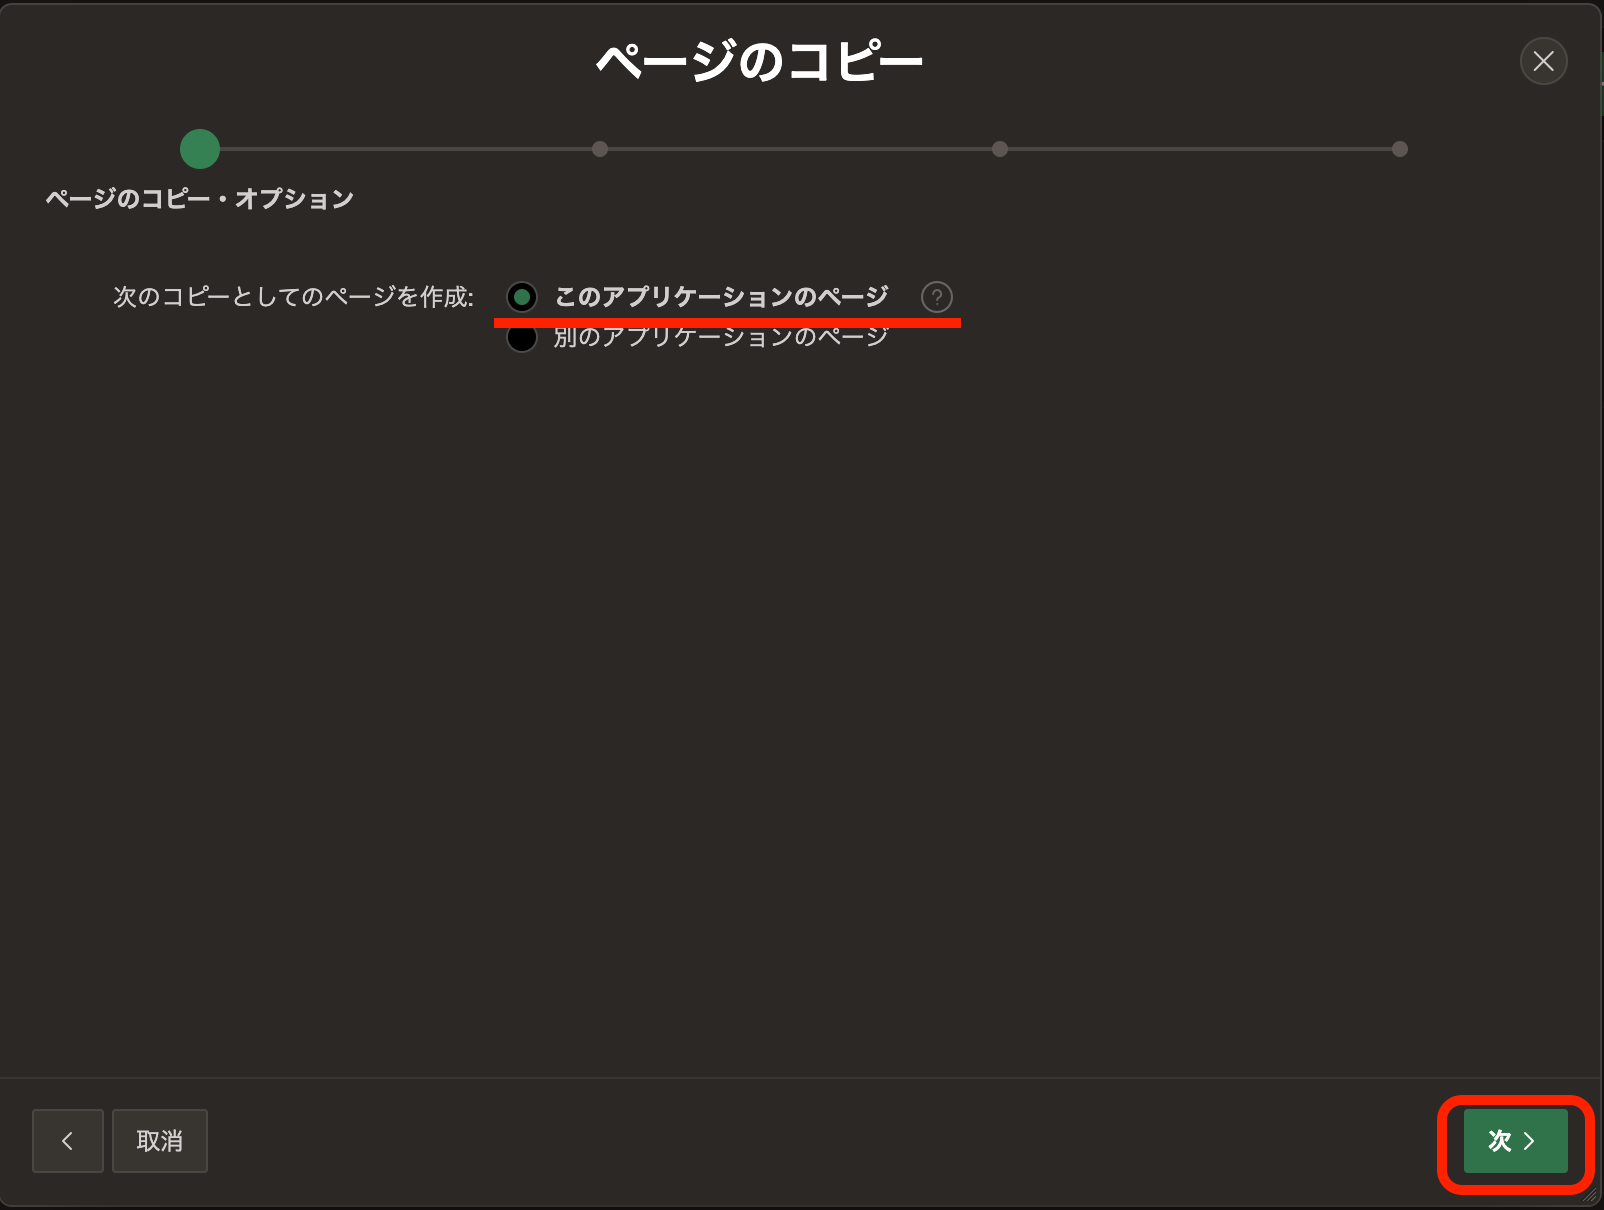
ページの作成を実行し、コピーとしてのページの作成を選択します。
次のコピーとしてのページを作成は、このアプリケーションのページです。
次へ進みます。
コピー元のページとして、すでにthree.jsを実装した2. Creating a sceneを選択します。新規ページ番号は3、新規ページ名はDrawing linesとします。
次へ進みます。
ナビゲーションのプリファレンスとして新規ナビゲーション・メニュー・エントリの作成を選択します。新規ナビゲーション・メニュー・エントリはデフォルトでDrawing linesになります。
次へ進みます。
リージョンのタイトルをCreating a sceneからDrawing linesに変更します。
以上でコピーを実行します。
ページのコピーが作成されます。
ページ・プロパティのJavaScriptのファイルURLを、ファイルdrawingLines.jsを参照するように変更します。
[module, defer]#APP_FILES#drawingLines.js
VS Codeの作業に移ります。ファイルdrawingLines.jsを作成します。内容は以下になります。
This file contains bidirectional Unicode text that may be interpreted or compiled differently than what appears below. To review, open the file in an editor that reveals hidden Unicode characters.
Learn more about bidirectional Unicode characters
/* | |
* three.jsのGetting Startedに含まれるDrawing linesの例題を、 | |
* Oracle APEXのページ上に表示するために、若干変更した。 | |
* | |
* 参照元: https://threejs.org/docs/index.html#manual/en/introduction/Drawing-lines | |
*/ | |
import * as THREE from 'three'; | |
/* | |
* APEXのページ内に収めるため、windowのサイズより小さめに表示する。 | |
*/ | |
const innerWidth = window.innerWidth / 2.0; | |
const innerHeight = window.innerHeight / 2.0; | |
const renderer = new THREE.WebGLRenderer(); | |
// renderer.setSize( window.innerWidth, window.innerHeight ); | |
renderer.setSize( innerWidth, innerHeight ); | |
// document.body.appendChild( renderer.domElement ); | |
document.getElementById("container").appendChild( renderer.domElement ); | |
// const camera = new THREE.PerspectiveCamera( 45, window.innerWidth / window.innerHeight, 1, 500 ); | |
const camera = new THREE.PerspectiveCamera( 45, innerWidth / innerHeight, 1, 500 ); | |
camera.position.set( 0, 0, 100 ); | |
camera.lookAt( 0, 0, 0 ); | |
const scene = new THREE.Scene(); | |
//create a blue LineBasicMaterial | |
const material = new THREE.LineBasicMaterial( { color: 0x0000ff } ); | |
const points = []; | |
points.push( new THREE.Vector3( - 10, 0, 0 ) ); | |
points.push( new THREE.Vector3( 0, 10, 0 ) ); | |
points.push( new THREE.Vector3( 10, 0, 0 ) ); | |
const geometry = new THREE.BufferGeometry().setFromPoints( points ); | |
const line = new THREE.Line( geometry, material ); | |
scene.add( line ); | |
renderer.render( scene, camera ); |
ページの保存と実行を行います。
最後にExamplesのanimation / keyframesを実装してみます。
ページのコピーまでは先ほどと同様に実施します。ページ名やリージョン名はanimation keyframesとします。
keyframesを実装するファイルはkeyframes.jsとします。ページ・プロパティのJavaScriptのファイルURLの記載は以下になります。
[module, defer]#APP_FILES#keyframes.js
animation / keyframesの右下にあるボタンをクリックし、例題のソースにアクセスします。
GitHubのリポジトリにあるファイルが開きます。
静的コンテンツのソースのHTMLコードを以下に置き換えます。著作権に関する記述を追加しています。
<div id="container"></div>
<div id="info">
<a href="https://threejs.org" target="_blank" rel="noopener">three.js</a> webgl - animation - keyframes<br/>
Model: <a href="https://artstation.com/artwork/1AGwX" target="_blank" rel="noopener">Littlest Tokyo</a> by
<a href="https://artstation.com/glenatron" target="_blank" rel="noopener">Glen Fox</a>, CC Attribution.
</div>
VS Codeに移り、ファイルkeyframes.jsを作成します。以下のコードを記述します。
This file contains bidirectional Unicode text that may be interpreted or compiled differently than what appears below. To review, open the file in an editor that reveals hidden Unicode characters.
Learn more about bidirectional Unicode characters
/* | |
* three.jsのExamplesに含まれるanimation / keyframes の例題を、 | |
* Oracle APEXのページ上に表示するために、若干変更した。 | |
* | |
* 参照元: https://github.com/mrdoob/three.js/blob/master/examples/webgl_animation_keyframes.html | |
*/ | |
import * as THREE from 'three'; | |
import Stats from 'three/addons/libs/stats.module.js'; | |
import { OrbitControls } from 'three/addons/controls/OrbitControls.js'; | |
import { RoomEnvironment } from 'three/addons/environments/RoomEnvironment.js'; | |
import { GLTFLoader } from 'three/addons/loaders/GLTFLoader.js'; | |
import { DRACOLoader } from 'three/addons/loaders/DRACOLoader.js'; | |
/* APEXの静的アプリケーション・ファイルの配置先 */ | |
const APP_FILES = apex.env.APP_FILES; | |
let mixer; | |
const clock = new THREE.Clock(); | |
const container = document.getElementById( 'container' ); | |
/* APEXのページに収まるように小さめにする。 */ | |
const innerHeight = window.innerHeight / 2.0; | |
const innerWidth = window.innerWidth / 2.0; | |
const stats = new Stats(); | |
/* containerの子要素になっているが、Statsが画面右上から移動しないので表示させない。 */ | |
// container.appendChild( stats.dom ); | |
const renderer = new THREE.WebGLRenderer( { antialias: true } ); | |
renderer.setPixelRatio( window.devicePixelRatio ); | |
// renderer.setSize( window.innerWidth, window.innerHeight ); | |
renderer.setSize( innerWidth, innerHeight ); | |
container.appendChild( renderer.domElement ); | |
const pmremGenerator = new THREE.PMREMGenerator( renderer ); | |
const scene = new THREE.Scene(); | |
scene.background = new THREE.Color( 0xbfe3dd ); | |
scene.environment = pmremGenerator.fromScene( new RoomEnvironment(), 0.04 ).texture; | |
// const camera = new THREE.PerspectiveCamera( 40, window.innerWidth / window.innerHeight, 1, 100 ); | |
const camera = new THREE.PerspectiveCamera( 40, innerWidth / innerHeight, 1, 100 ); | |
camera.position.set( 5, 2, 8 ); | |
const controls = new OrbitControls( camera, renderer.domElement ); | |
controls.target.set( 0, 0.5, 0 ); | |
controls.update(); | |
controls.enablePan = false; | |
controls.enableDamping = true; | |
const dracoLoader = new DRACOLoader(); | |
/* APP_FILES以下を参照するように変更 */ | |
dracoLoader.setDecoderPath( APP_FILES + 'jsm/libs/draco/gltf/' ); | |
const loader = new GLTFLoader(); | |
loader.setDRACOLoader( dracoLoader ); | |
/* APP_FILES以下を参照するように変更 */ | |
loader.load( APP_FILES + 'models/gltf/LittlestTokyo.glb', function ( gltf ) { | |
const model = gltf.scene; | |
model.position.set( 1, 1, 0 ); | |
model.scale.set( 0.01, 0.01, 0.01 ); | |
scene.add( model ); | |
mixer = new THREE.AnimationMixer( model ); | |
mixer.clipAction( gltf.animations[ 0 ] ).play(); | |
renderer.setAnimationLoop( animate ); | |
}, undefined, function ( e ) { | |
console.error( e ); | |
} ); | |
window.onresize = function () { | |
// camera.aspect = window.innerWidth / window.innerHeight; | |
camera.aspect = innerWidth / innerHeight; | |
camera.updateProjectionMatrix(); | |
// renderer.setSize( window.innerWidth, window.innerHeight ); | |
renderer.setSize( innerWidth, innerHeight ); | |
}; | |
function animate() { | |
const delta = clock.getDelta(); | |
mixer.update( delta ); | |
controls.update(); | |
stats.update(); | |
renderer.render( scene, camera ); | |
} |
keyframs.jsが参照しているファイルをGitHubのリポジトリからコピーします。
以下のファイルをmodels/gltf/LittlestTokyo.glbとして保存します。
https://github.com/mrdoob/three.js/blob/master/examples/models/gltf/LittlestTokyo.glb
以下のファイルは、jsm/libs/draco/gltf以下にコピーします。
https://github.com/mrdoob/three.js/blob/master/examples/jsm/libs/draco/gltf/draco_decoder.js
https://github.com/mrdoob/three.js/blob/master/examples/jsm/libs/draco/gltf/draco_decoder.wasm
https://github.com/mrdoob/three.js/blob/master/examples/jsm/libs/draco/gltf/draco_wasm_wrapper.js
VS Codeのエクスプローラーからは、コピーしたファイルは以下のように見えます。
以上でページを実行すると、以下のように表示されます。
three.jsの例題の実装は以上です。
今のままではLive Serverからファイルを参照しているため、作成したアプリケーションを他の人と共有することができません。すべてのファイルを静的アプリケーション・ファイルとして、APEXにアップロードするとアプリケーションの共有はできますが、アプリケーションの開発効率やデータベースへの負荷を考慮すると、あまり良い方法とは思えません。
現行のバージョンのAPEXは静的アプリケーション・ファイルの保存先および参照先を、オブジェクト・ストレージにすることができます。APEX 23.2で追加された機能で、こちらの記事で紹介しています。
また、静的アプリケーション・ファイルの参照先にCDNを指定するといったことも可能です。
JavaScriptのコーディングが主になる場合は、コードを記述したファイルをAPEXの外で管理すると、開発効率を上げることができると思います(PL/SQLでもコードをパッケージにまとめると、同様に管理できます)。
今回の記事は以上になります。
静的アプリケーション・ファイルは含んでいないため、ほとんど中身がないAPEXアプリケーションですが、エクスポートを以下に置きました。
https://github.com/ujnak/apexapps/blob/master/exports/three-js-getting-started.zip
Oracle APEXのアプリケーション作成の参考になれば幸いです。
完